Overview
Vermicomposting at home is one of the easiest ways for a person to divert organic waste from landfills while at the same time creating a nutrient-rich soil amendment for your home garden.
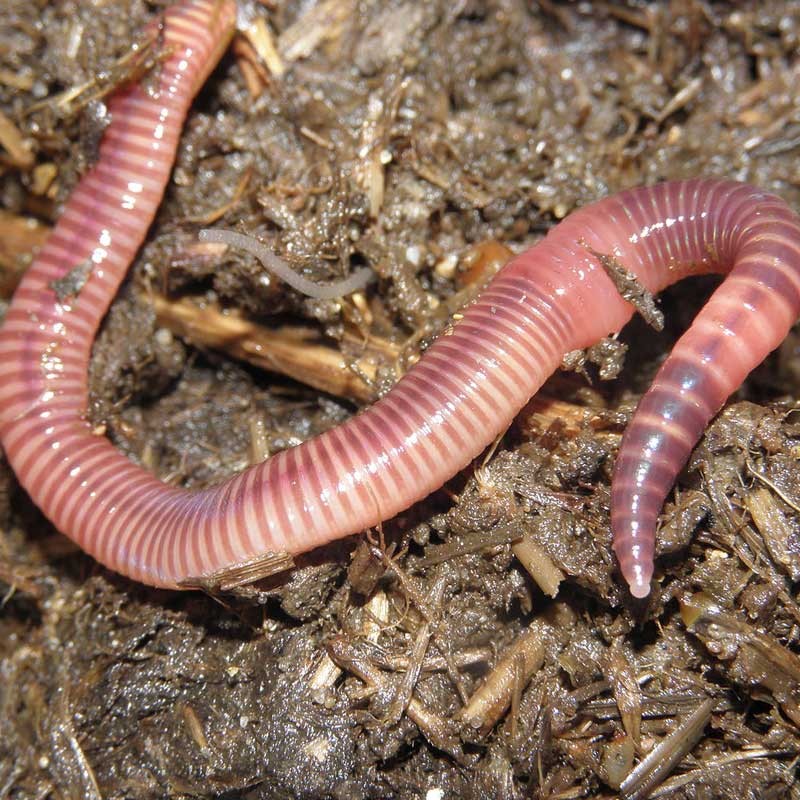
Earthworms have been ploughing soil since the beginning of time. Different worms serve different purposes, but what they all have in common is they eat decaying organic matter. As it passes through their bodies, they help break it down. Their manure, which are known as vermicast, are a great addition for any garden. And, as they burrow into the soil, they aerate the soil, while helps create a great environment.
Here are just a few benefits of composing with worms:
- Reduce disposal to landfill
- Create a nitrogen-rich soil amendment for your garden
- Helps plants grow larger and stronger
- Eliminate the need for synthetic fertilizers
- Naturally discourages pests
Type of worms used:
Most people start out with There are thousands of types of earthworms, but for the purpose of vermicomposting, we are going to focus on just one type: Eisenia fetida. Also known as red wigglers, these worms are commonly used as fishing bait. They are ideal for vermicomposting because they are surface-dwellers, never burrowing more than six inches below the surface.
Sizing your bin:
As a rule of thumb, red wigglers require about square foot of surface area for every pound of worms. Their eating capacity varies based on the type of food and other conditions, but one pound of worms should be able to eat about their body weight in food per week.
Before building a bin, it is recommended that you weigh your food scraps each week to get a better idea of how much surface area for processing you will need.
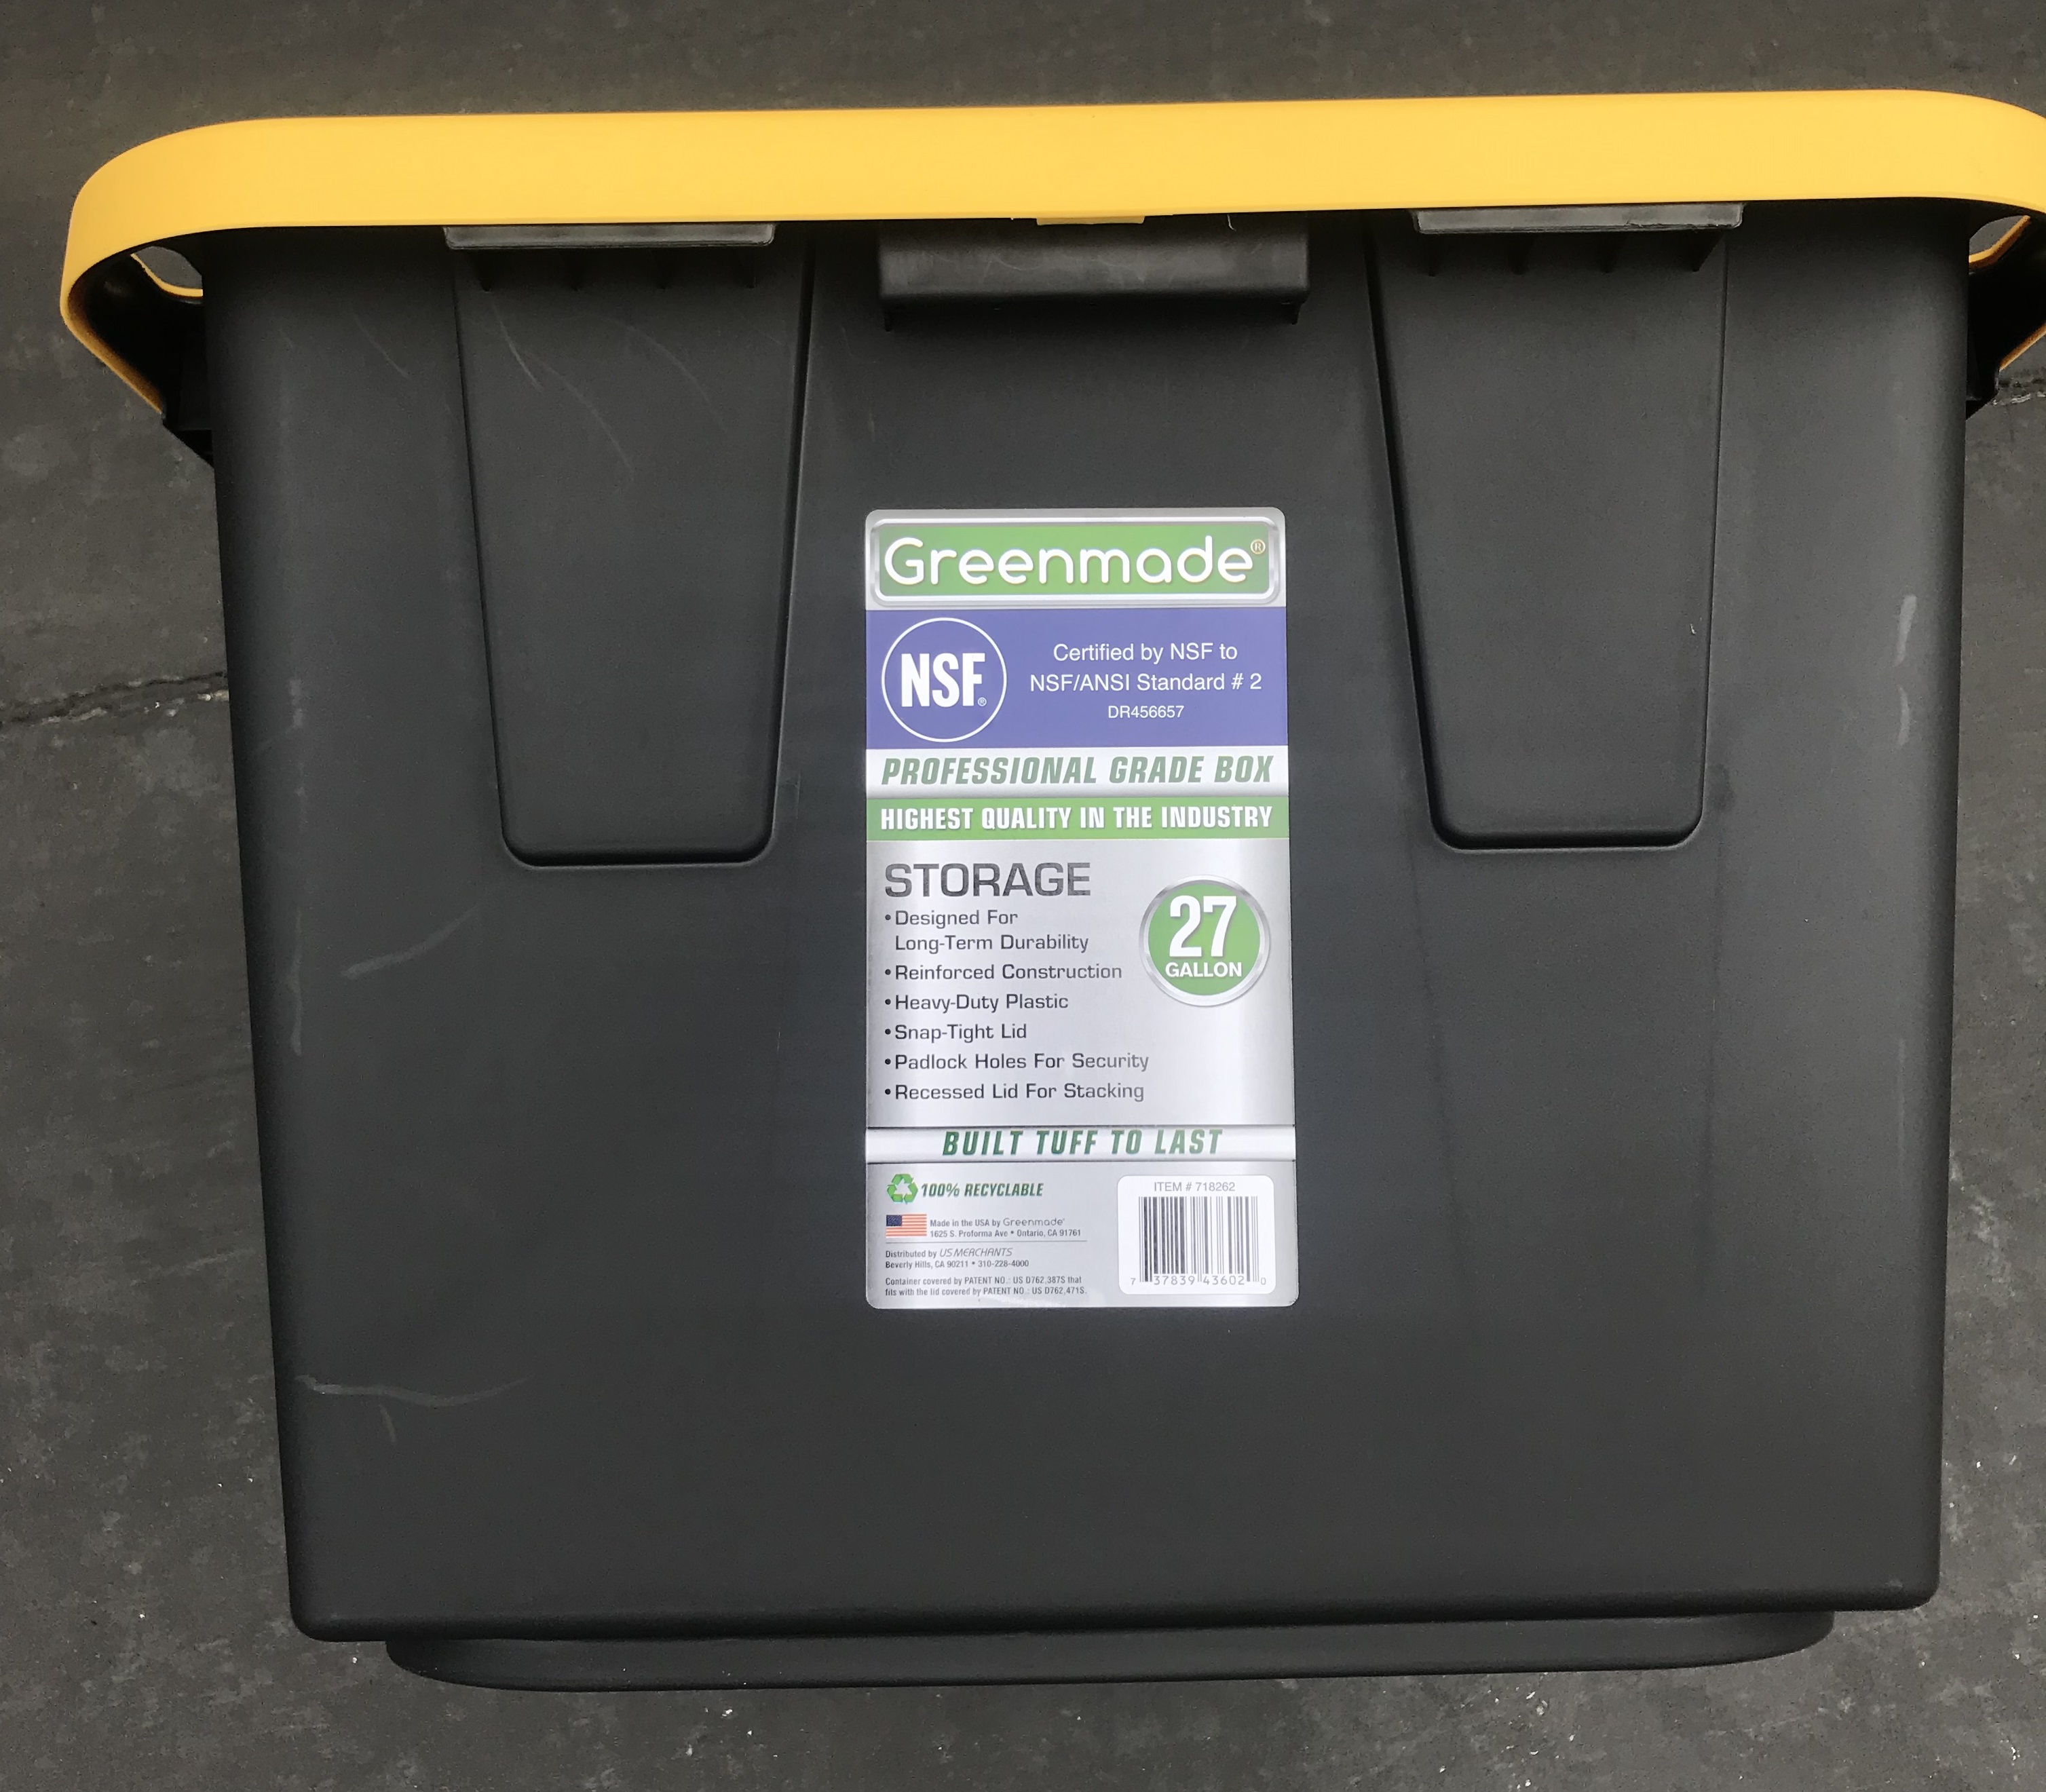
My first worm bin was made from a 5-gallon Rubbermaid Roughneck container. It had a maximum capacity of maybe one-and-a-half worms. It worked fine, but I wanted to increase the number of worms in my bin, so I upgraded to a 27-gallon container.
- Length: 30.5”
- Width: 20.125”
- Surface area: (30.5/12) x (20.125/12) = 4.26 square feet
Supplies needed:
- (2) – 5-gallon or larger containers (both must be the same size)
- The larger the setup, the sturdier the bins needed
- (1) container lid
- A drill
- Two or three bricks, blocks or pieces of wood
- Bedding
- Food
Optional supplies:
- Mesh screen

Setting up your bin:
Drainage and airflow are key to the success of your worm bin. Too much moisture and not enough airflow lead to anaerobic conditions which are toxic to your worms.
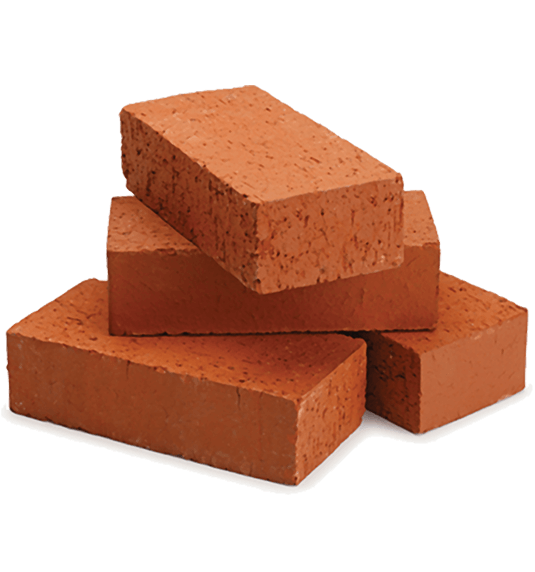
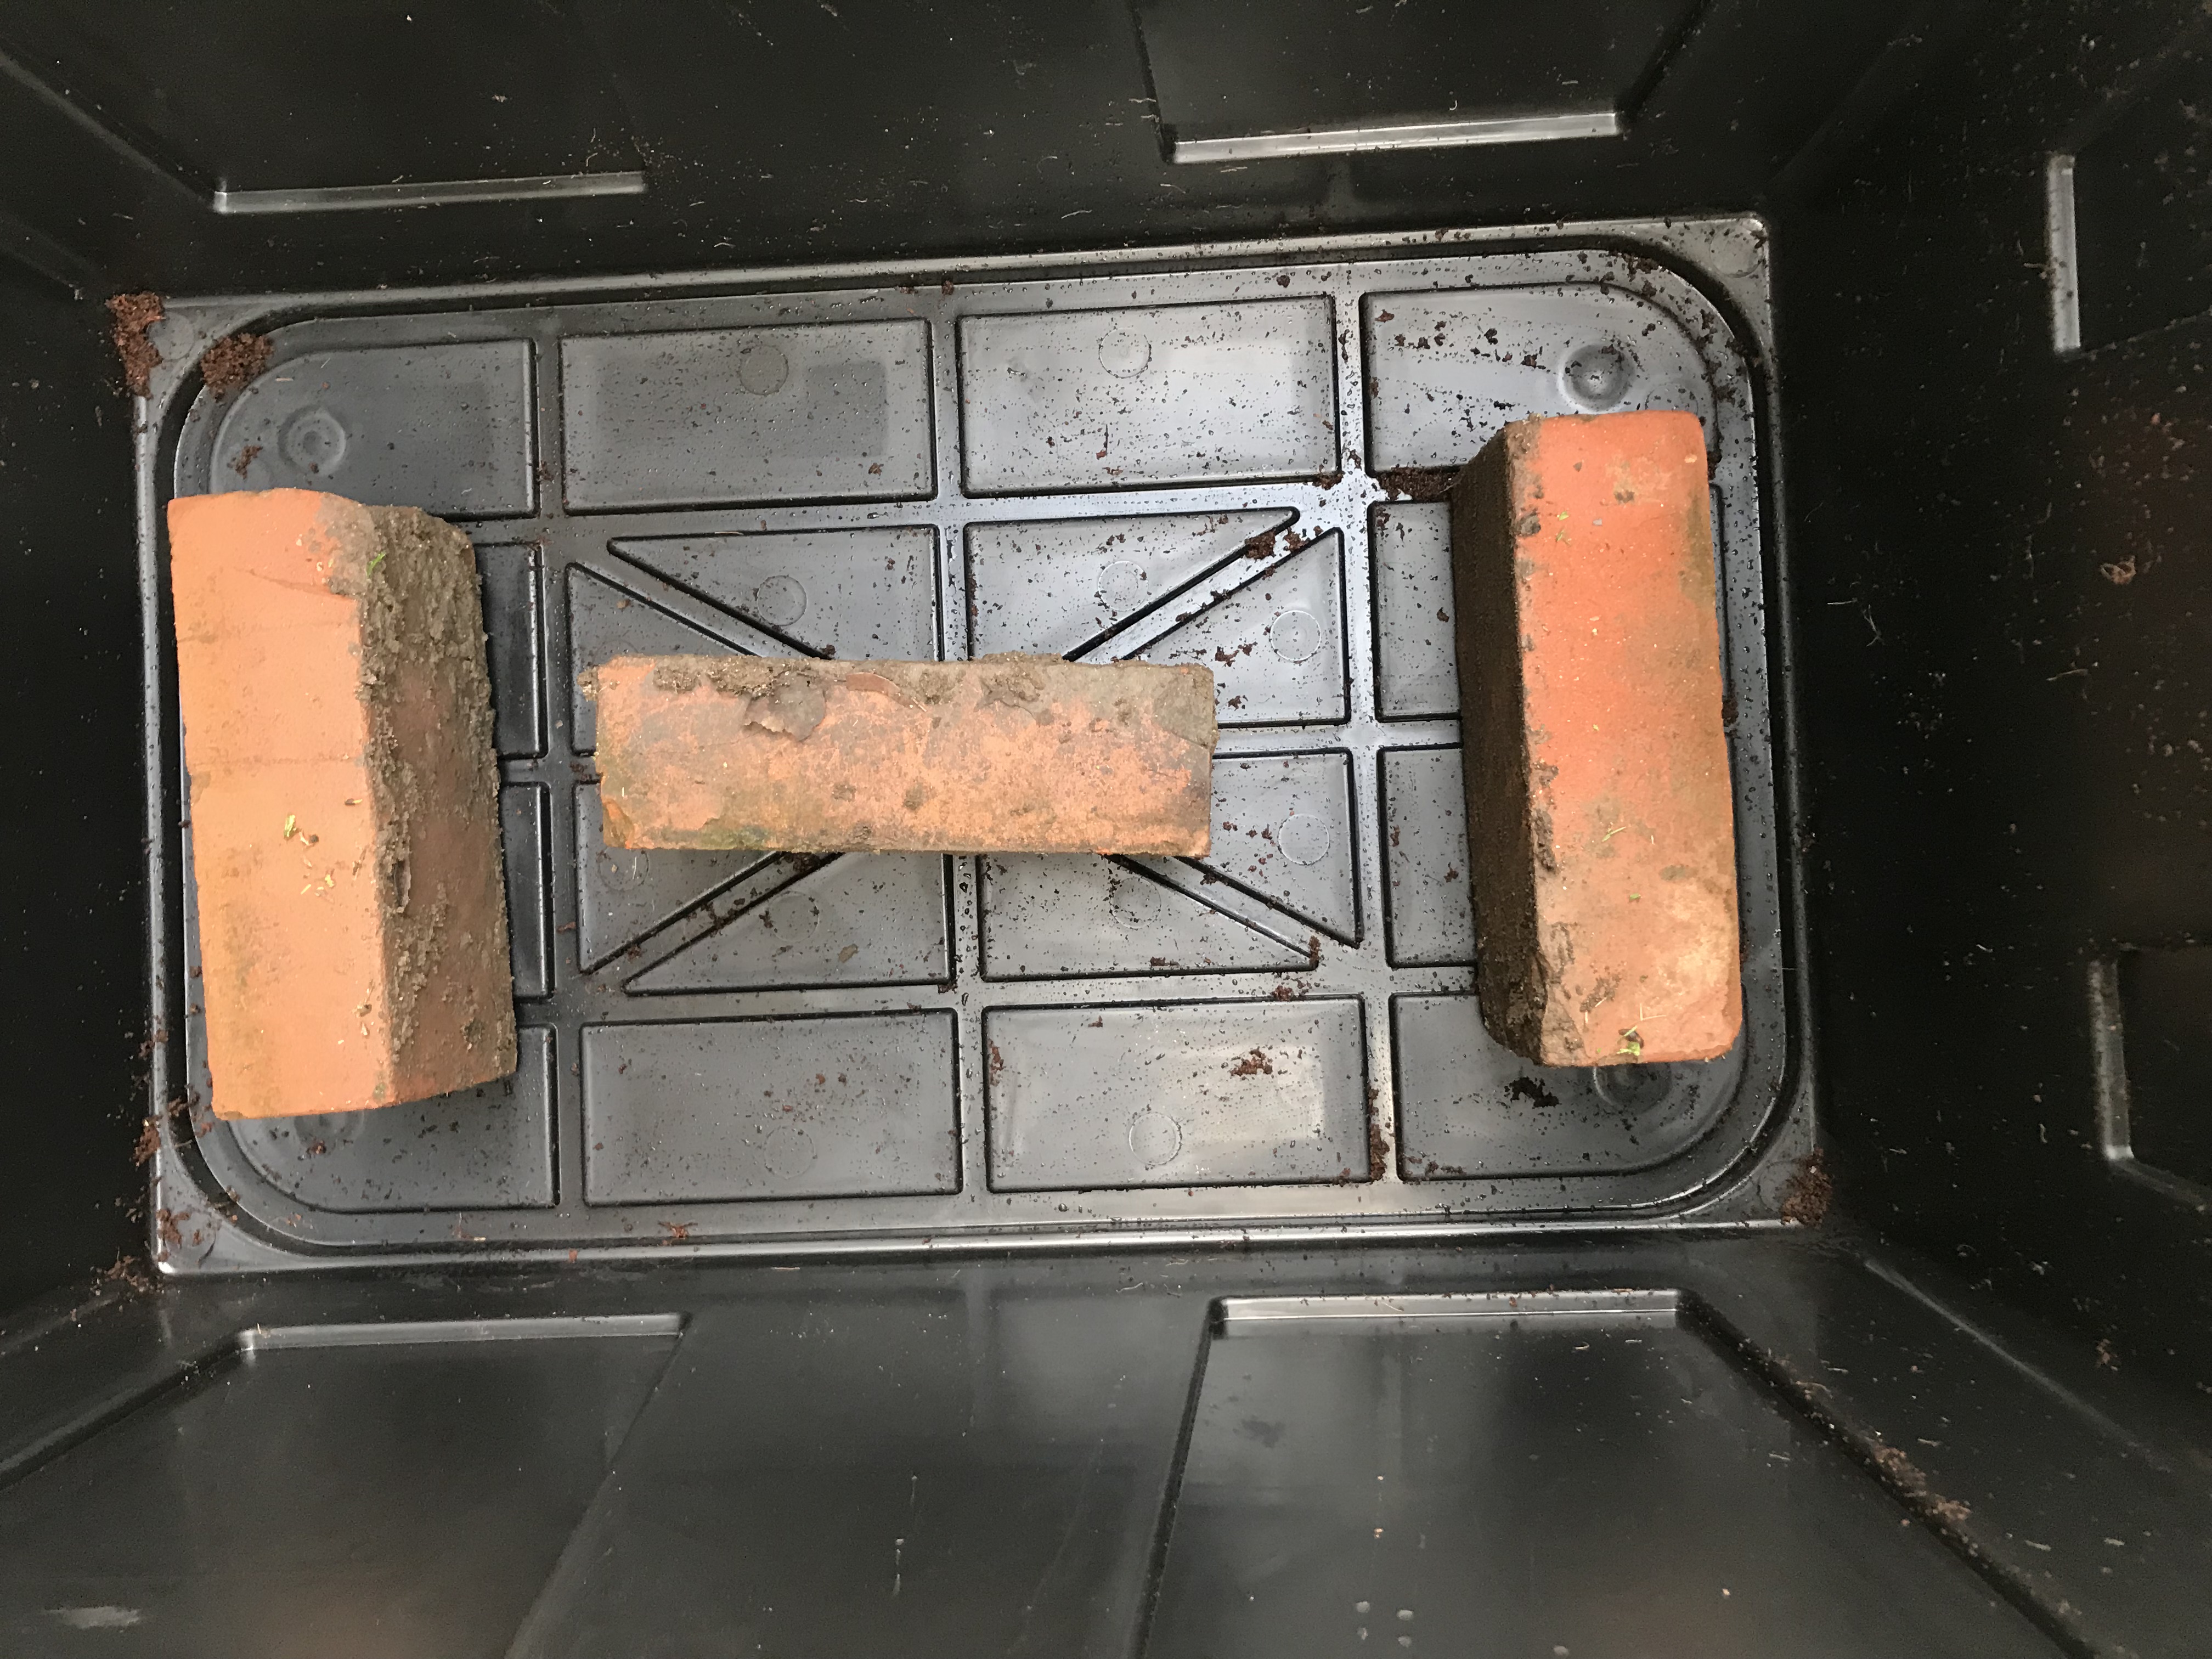
The bottom bin is used to collect leachate and any excessive moisture. Place two or three bricks, blocks or wood pieces on the bottom of your bottom bin. Bricks work well because they are exactly the same size. It is important to leave at least a few inches of space between the top and bottom bins for the accumulation of liquid.
You can now set aside the bottom bin. You won’t need it until the top bin is ready.
As I have mentioned previously, airflow is a key component for your worms to survive and thrive. A power drill is not required to make your bin, but it will make the process much easier.
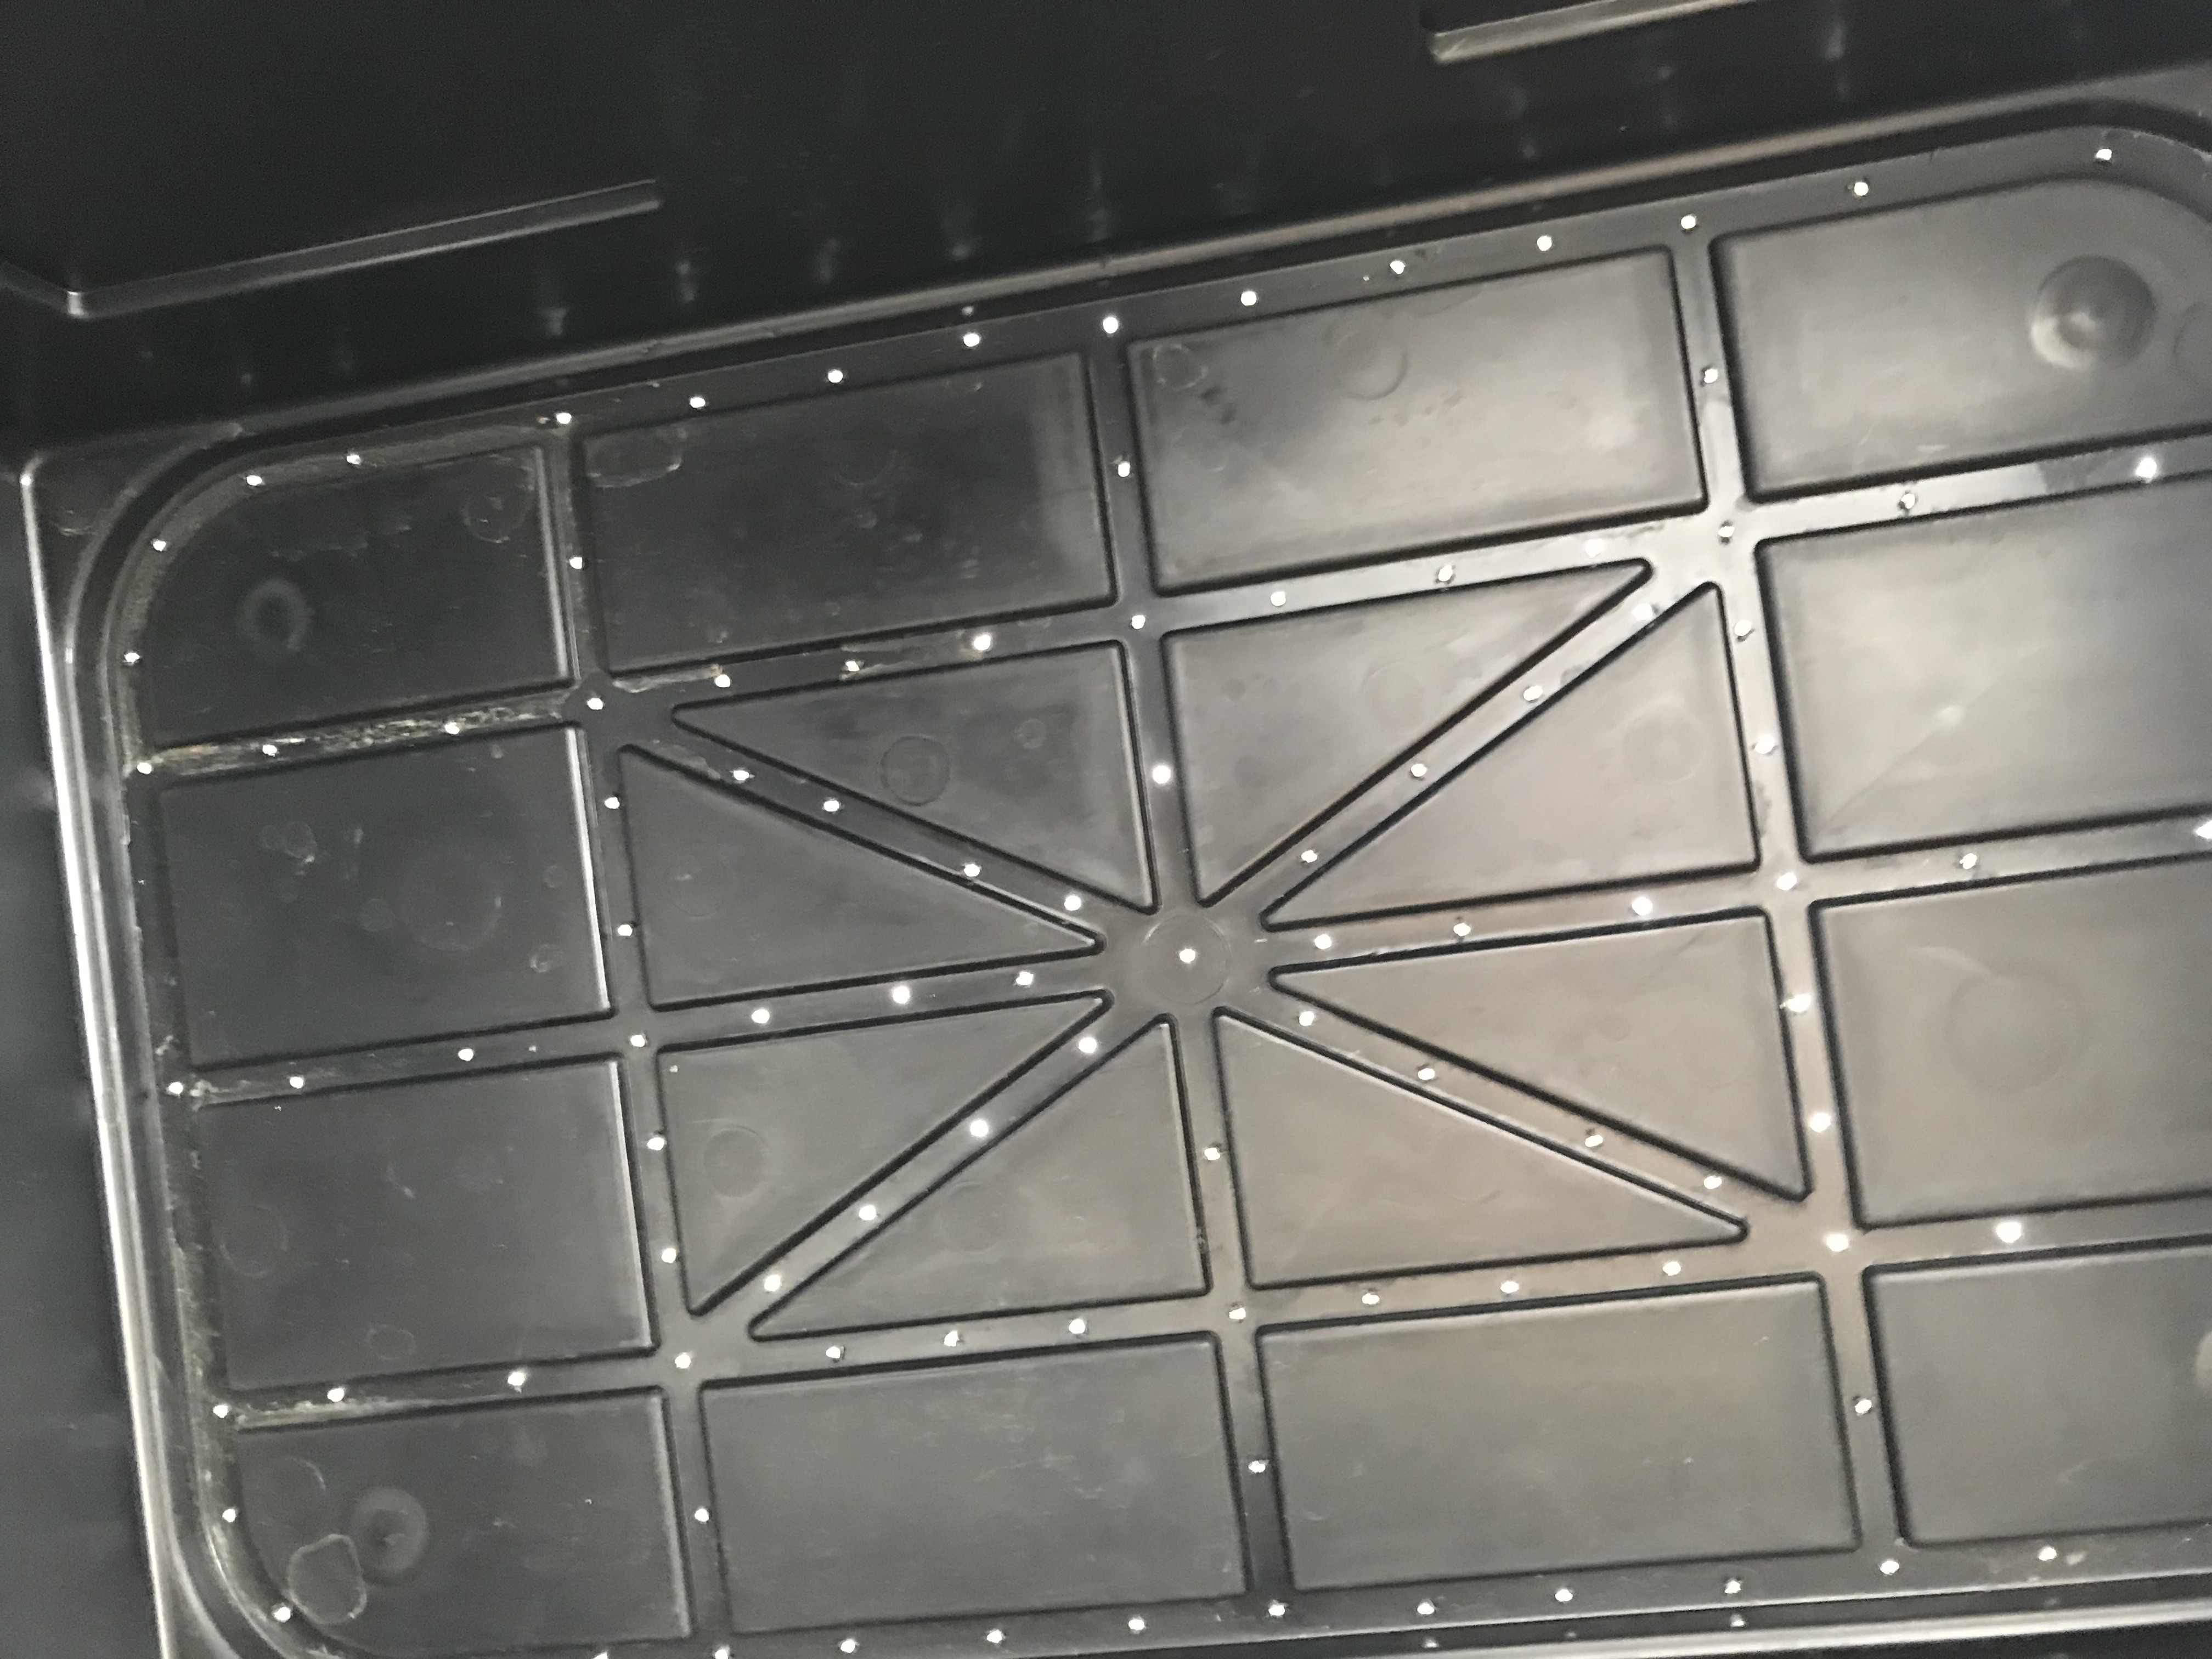
Drill 1/8” holes every two inches all along the bottom of the bin. These tiny holes will allow liquid to flow into the bottom catchment bin, but should be small enough that your worms won’t wiggle through them.
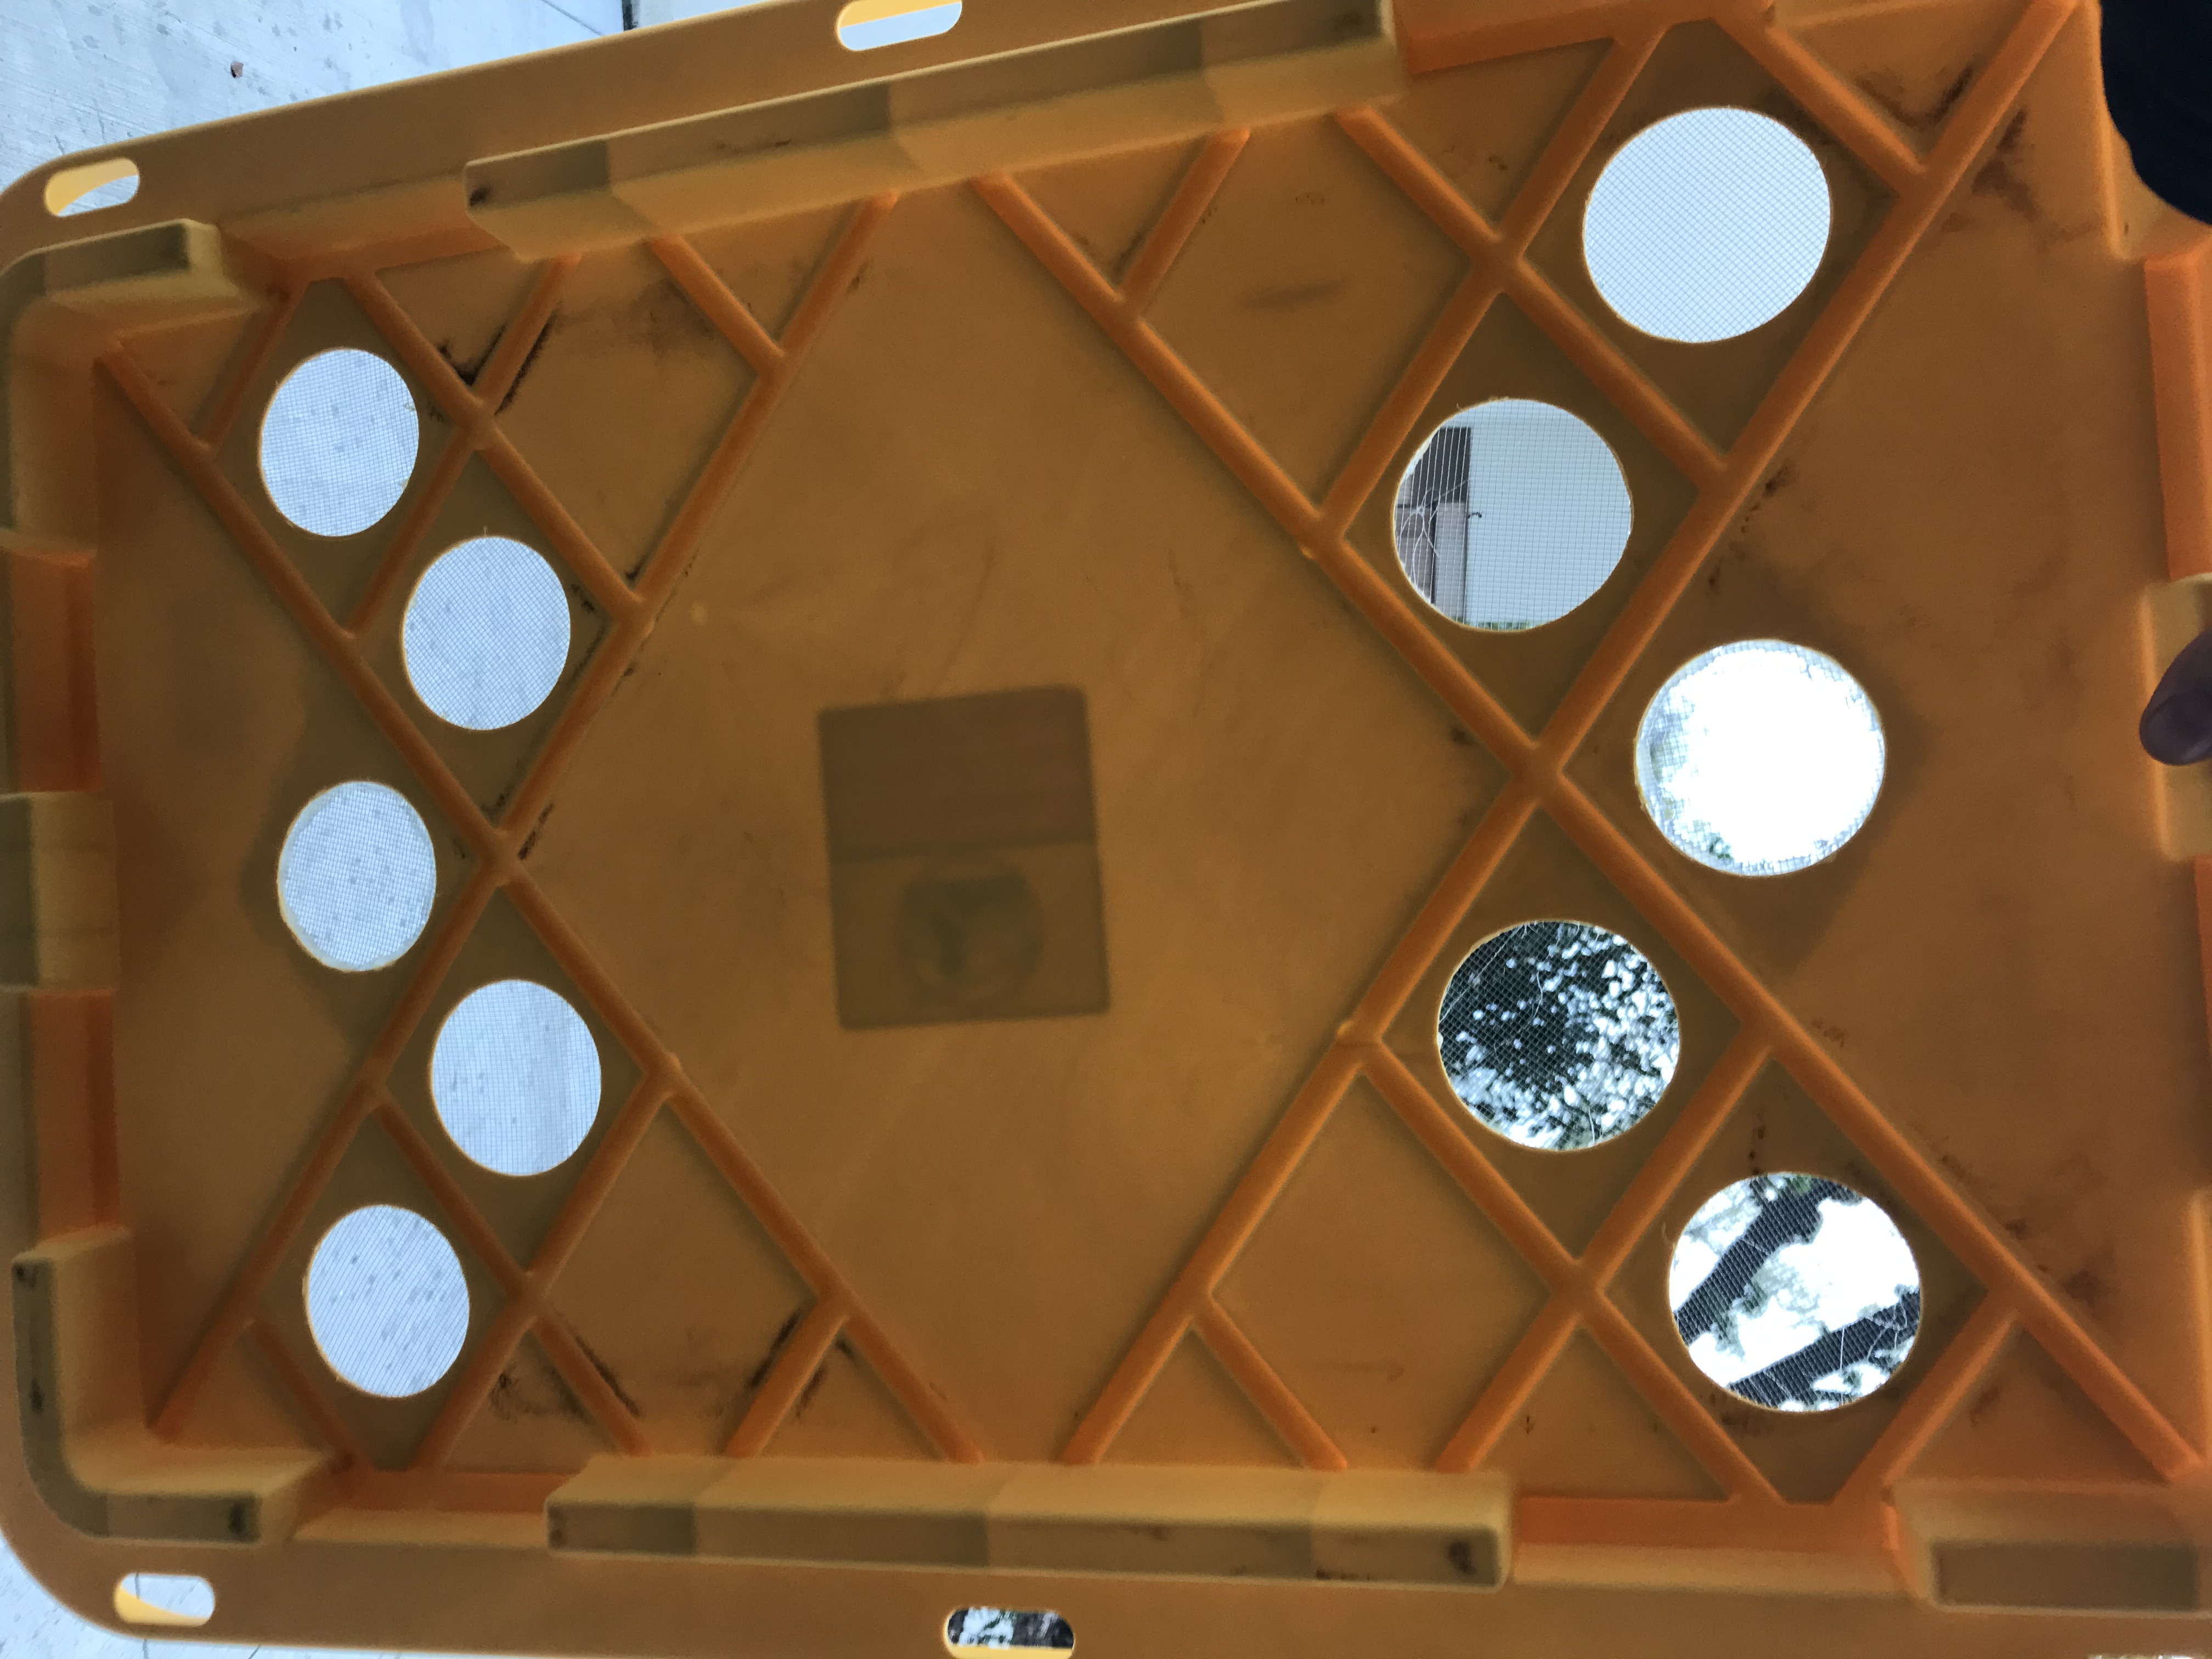
Drill ¼” holes every two inches along the outside of the bin. Do this a few inches from the top of the bin. Additionally, drill ¼” holes every few inches on the lid. As an optional step, you can make the holes even larger. There are two potential downsides to larger holes:

- Larger holes will maximize airflow, which will cause the top bedding to dry out quickly, which will potentially require you to water more frequently than with smaller holes.
- Pests and vermin will be able to gain access to the bin with larger hole.
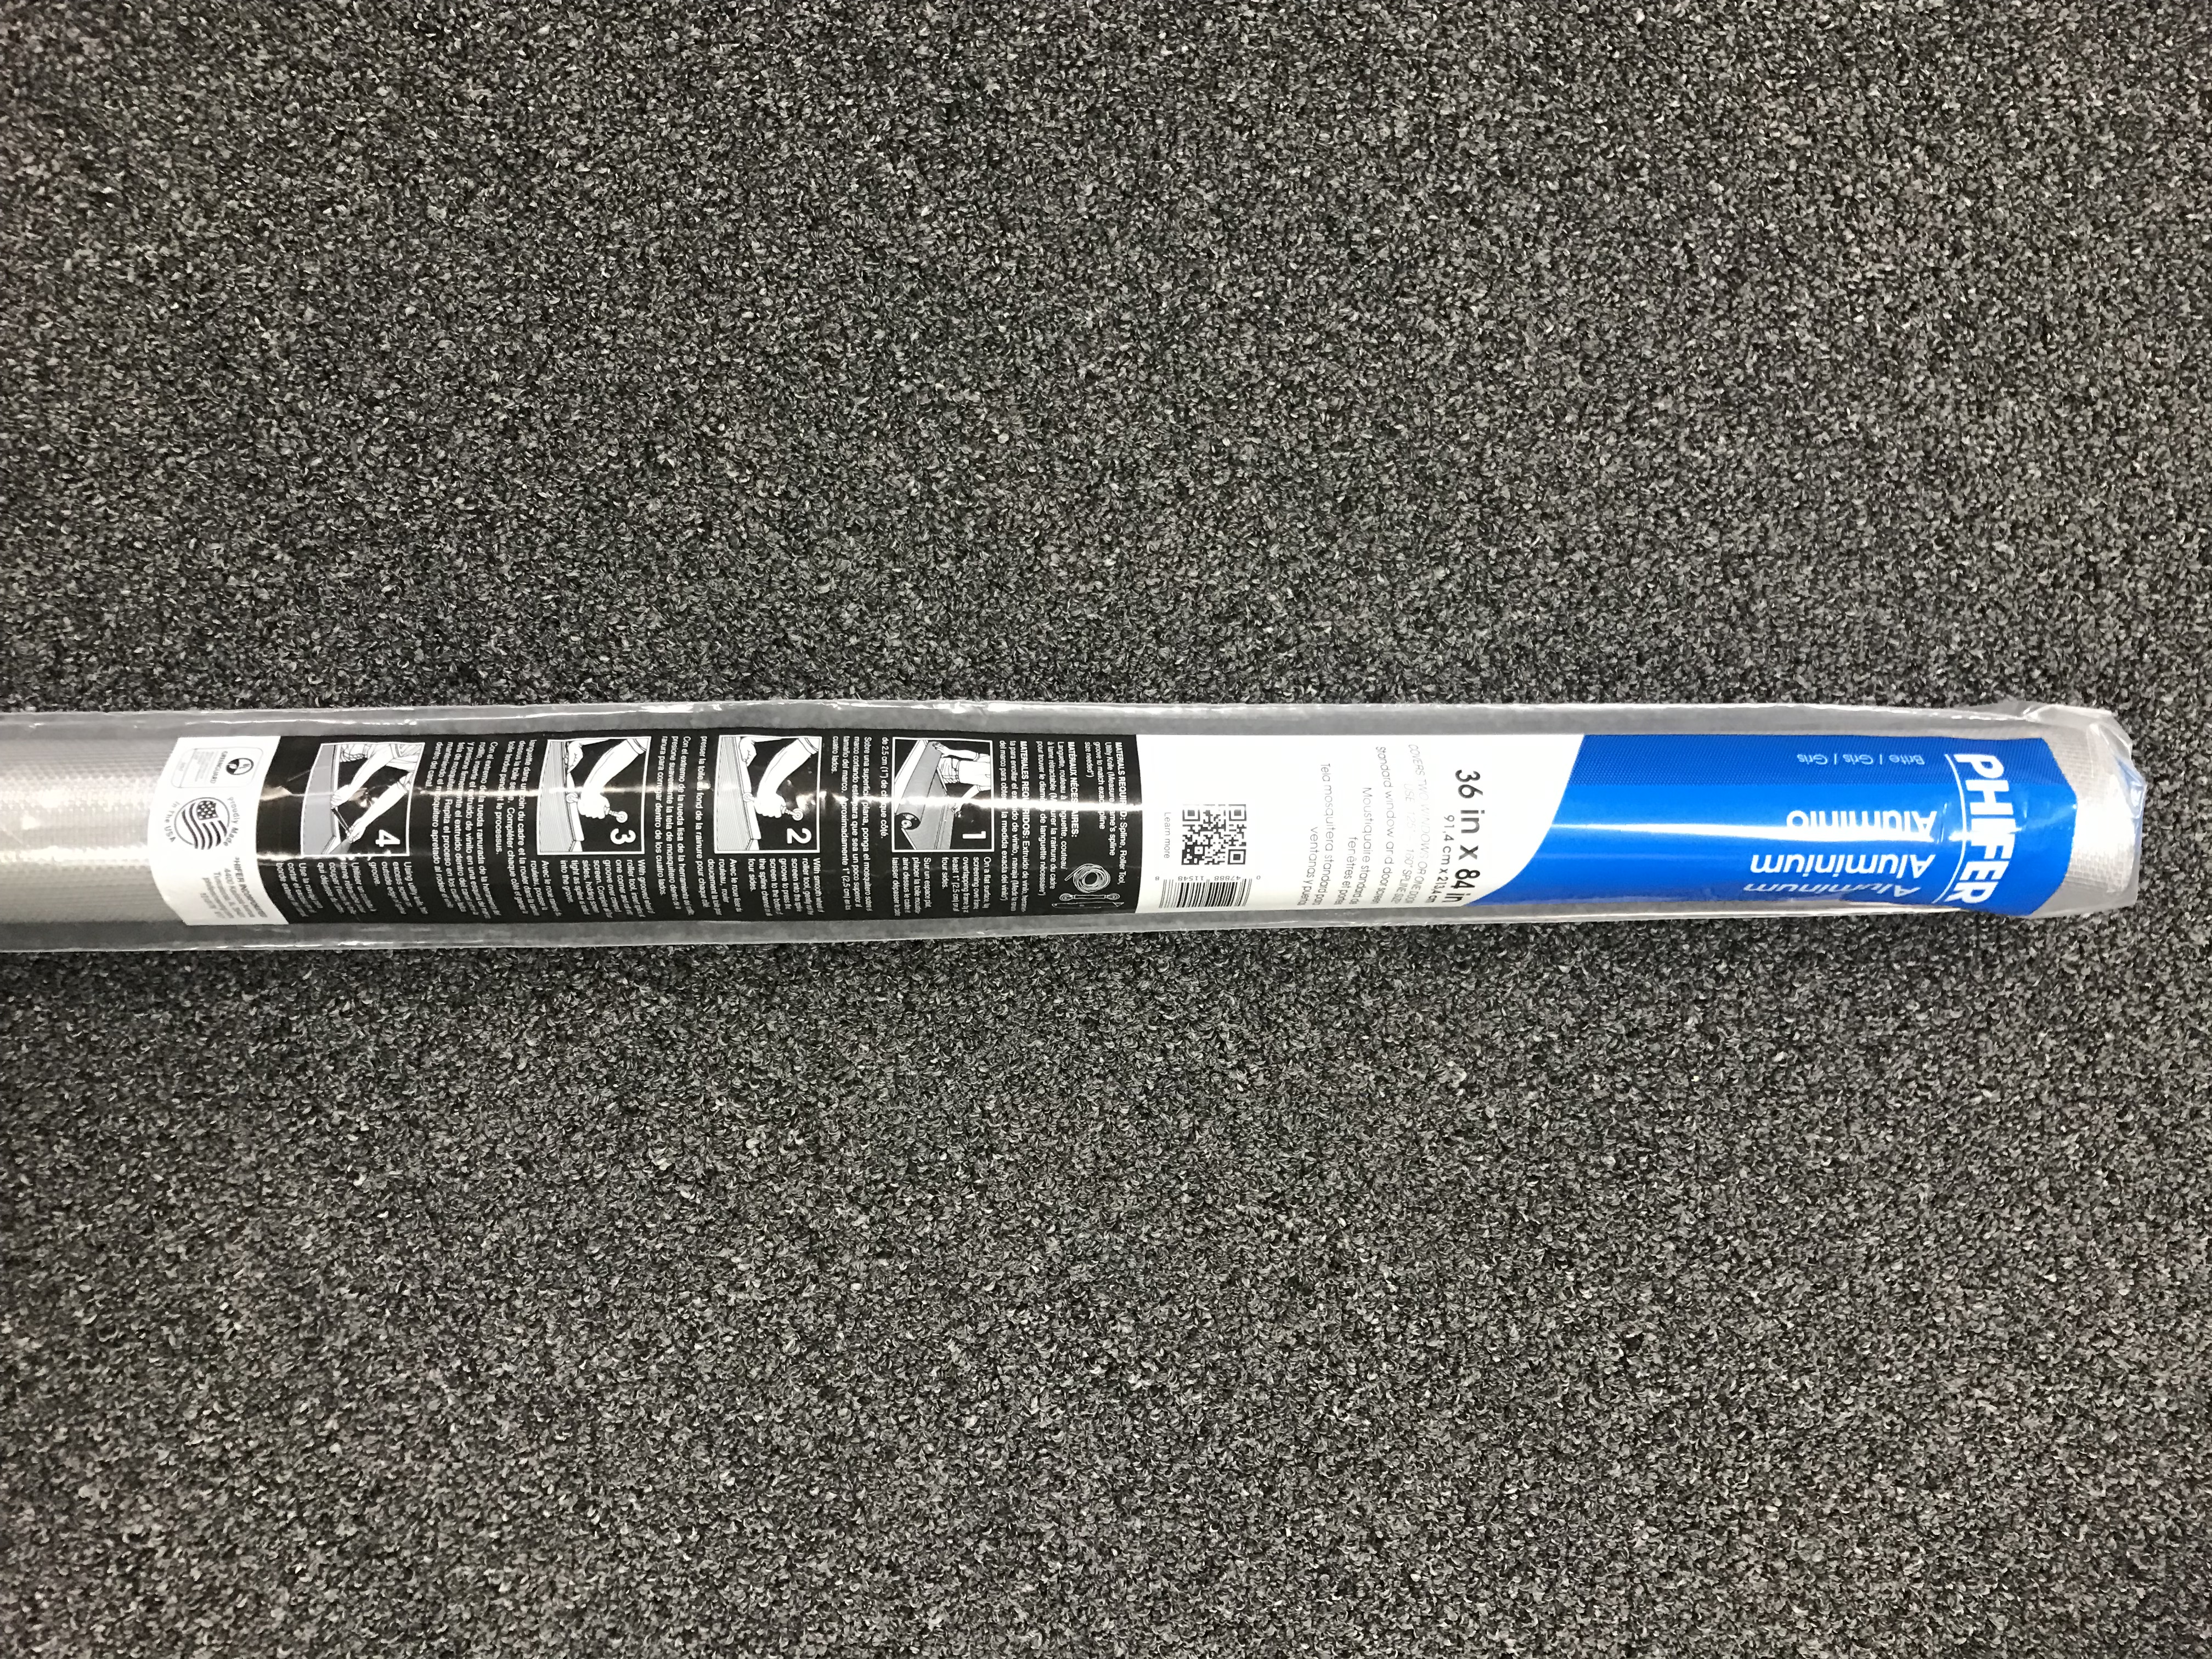
If you decide to make larger holes, such as the ones on my lid, I recommend covering the holes with screen door material and some glue. Rolls of replacement screen door material are inexpensive and available at any hardware store.
Now that your bin is ready to go, there are a number of materials that can be used as bedding. Leaves, for example, make great bedding. Their sturdy structure makes for a great home for worms, providing them with shelter and air flow.
I have also great luck using coconut coir (pictured), which is a byproduct of harvesting coconuts for their juice and meat. Anyone who has cracked open a coconut knows just how hard the outer shell and husk are. Coconut coir is that outer material that has been ground down into much smaller fibers. Once adequately hydrated, your coir will make consistent, fluffy bedding.
As I mentioned previously, red wigglers only need four to six inches of bedding to thrive. To prep your coir, it is recommended that you use a container, such as a 5-gallon bucket from Home Depot. Place the coir in the bottom on the bucket, then add enough water to cover it. You can either wait patiently for it to absorb the water, or help it but pulling it apart. Once the material has the moisture content of a wrung-out towel, it is ready to go into your bin. The size of your bin will determine how many coir blocks are needed.
Leaves, grass clippings and other materials for the natural world will bring adequate microbial activity to your bin that will help your worms thrive. If you decide to go with coconut coir, it is important to add at handful of leaves or healthy soil to jump start your bin.
It is also important to note that worms have tiny mouths and no teeth. Adding some sand or finely ground egg shells will provide them with grit that will help them process their food.
What worms need to thrive:
- Air
- Water
- Bedding
- Food
Prepping their food:
Food can be added in whole pieces, but it is recommended that you use soft foods or foods that are finely chopped. Worms seem to have no trouble, and in fact greatly enjoy eating melons, but struggle with the rind. Chopping it into tiny pieces will allow it to get moldy, break down and soften more quickly, which will increase their capacity.
Food worms love:
- Most fruits and veggies
- Coffee grounds
- Egg shells
Food to avoid:
- Meat and dairy
- Citrus
Where to find worms:
Red wigglers can be purchased online and typically run about $40 per pound. They reproduce quickly, so starting with a half- or full-pound of worms should be sufficient to get you started. I would also recommend looking for a local worm breeder prior to buying them online. You can also see if your local government agency supplies them. The County of Los Angeles, for example, sells worms to its residents as a subsidized rate of $10 per half-pound.
Conclusion:
It will take some trial-and-error to get your worm bin dialed in. Worms are fairly robust, but are sensitive to a few conditions. They prefer an environment that is free from direct sunlight and kept between 55 and 80 Fahrenheit. When it gets too cold, they will ball up for warm and not eat very much. Place them in direct sunlight too far above 80 degrees and they will dehydrate and die.
Start small and feel them out. My worms have been thriving for years, all thanks to a little patience and some persistence.
If you decide to use this guide to setup your first worm bin, please let me know how it goes!
About the author
Jonathan Levy is an environmental consultant and social media influencer. When he isn’t working with businesses on ways to reduce waste, you can find him spending time with his red wigglers…all 4000 +/- of them!

Hi Jonathan, thanks for such a detailed and informative post about vermicomposting, it’s very useful for people like me who have a garden, and I’m now considering organizing such a worm bin, though I haven’t decided yet. But what about the smell? Organic waste usually stinks, and I always put a dumpster cover over the organic garbage bin in my yard to prevent the bad smell from going out. Do I have to buy another one for such a worm bin?
Hey Teresa,
As long as you get the Carbon to Nitrogen ratio balanced, it won’t smell. The bedding in which the worms live in is the dead, brown carbon, such as coconut coir, dead leaves or grass clippings, or shredded newspaper. Make sure the nitrogen rich food scraps are well insulated by the carbon and that you aren’t over feeding your worms, and you won’t have to deal with smells.
Good luck!
Jonathan
This was very informative. I plan on creating this environment for renewing my house plant soil and want to stay on the small side of things. My concern is the decomposition will create heat and I’m not sure if the holes I create will allow enough heat to escape. I will use the black bin u showcased. It will be on my apt balcony in the shade. I’m wondering if I use chicken wire instead of a lid may do the trick. What do u think?
One thing I’ve noticed with the the size of the holes on the lids that I have is that that the top dries out pretty quickly. The bin I used previously was much smaller with smaller holes, and I felt like I rarely added water. With this one, I’m finding myself adding water a few times per week. I would advice against using chicken wire, because I think you’ll find yourself moistening it frequently.
Or of you use a lid just use the same 1/8 inch drill bit and put holes every inch it’s what I use the dirt stays at a good moisture level very seldom have to add water
Very true. I’ve found that fewer and smaller holes actually work better for that same reason. As long as you have fluffy bedding it doesn’t seem to be an issue.
Thank you for the detailed instructions for building the compost bin. What would my next steps be for collection and making worm tea to spread onto my garden?
Hi Anne,
Depending on how big your bin is and how quickly your worms generate castings, it might be 6 months or more before you are able to harvest castings. I personally have not made any tea myself, because I take whatever castings are generated and put them directly into the garden.
If you were to make tea, it’s a pretty straightforward process. Harvest castings and steep in water.
About 4 years ago i started a worm bed to supply myself with worms for fishing. After reading your post i am surprised that bed lasted as long as it did! I did most everything wrong! Not enuf air, too many worms for the size of the container and i probably starved the worms!!!
I am gonna try again following your guidelines. THANK YOU MUCHLY FOR THIS POST!!!
Fortunately it’s a learning process and worms can be very forgiving.
Hi,
Thanks for all of this information. I will do exactly the same with two102L Boxes !
But i’m worried about the 1/8” holes …
Does dirt or warm go trought ?
Is it too big or too small ?
Do I need to add a Fiberglass Screen ?
So many great questions! Drill the holes in the lid and high enough up on your container to where you would never fill it that high. As long as the worms are happy they won’t try to escape out the holes. I have noticed that sometimes a few worms wriggle their way through the drainage holes and end up in the bottom liquid collection area. Every so often separate the two lids and see if any are down there. Let me know how it works out!
Hello
I live in the county of LA. Where can I buy the red wigglers at the reduced /subsidized price?
You should be able to find some for sales at smartgardening.com.
How to get know the right number of compost worms for composting?
You have to feel them out. I have heard a lot of different metrics, but have found that I can only feed them what they are capable of eating.
Thanks for this article! I have a large outdoor garden and cook constantly, so this will be a fun project. Do you have any images of what your bedding looks like before/after you start? I have a lawn and lots of trees, so I’m leaning toward using that for bedding rather than spending money on coconut…
I definitely don’t think you need coconut coir. Although it makes for robust bedding, it is heavily processed and doesn’t seem to have any microbial activity with it. I love using leaves and horse manure (aged is better). Camphor and magnolia tree leaves work great. Avoid eucalyptus and other leaves that are a little too potent for them. I also dislike shredded newspaper and cardboard because it doesn’t provide any nutrients (just like the coconut…). I don’t seem to have quick access to before and after photos, but I do have a recent Instagram post that shows my setup. https://www.instagram.com/p/CIWQ-tap_Me/
What do you think of rabbit manure to feed the worms?
And if I propped the bin higher and had just one larger opening so the water leached into just one container… do you think that would work?
How do you clean the lid below the bin? Does that get smelly?
And how do you buy one bin and two lids? Did the store give you grief about that?!
Rabbit manure works great, but you need to age it (aka, pre-compost it) before using it at bedding. If you don’t, the urine that accumulates in the manure is too potent for them, causing them to get irritated and most likely die. Once the manure is fully dried out, it should be ready to add to your bin. Since worms are very sensitive to dry conditions, you will need to make sure that the manure is re-hydrated with water so it is damp prior to adding it to the bin.
I use a two container system. have a few bricks the prop the top container up. That allows for the liquid to pool at the bottom. Occasionally I remove the top container so I can drain the liquid. I often apply the liquid right back onto the worm bin, and have seen positive results.
I don’t ever clean the lid…or the bin. As long as you don’t overfeed the worms, it won’t get smelly. It’s also a good idea to have a solid layer of bedding on top of the food which keeps any potential smell down while preventing other critters from getting in there.
I bought two bins with two lids…so I guess I have a backup.
How do the worms get up to the third container,do you need to build a high spot so they can get to the holes
The worm bin described in this post is made up of just two containers. The top container contains the worms, bedding, and food. It has small holes drilled in the bottom to minimize worms getting into the bottom container. The bottom container is strictly used to accumulate liquid that drains from the top layer. By the time this bin is ready to harvest, I typically find it easier to dump it out and remove the castings, rather than trying to get the worms to migrate up a level. If you do decide to go with another level. Just make sure the holes are big enough for them to find their way up. Several holes at 1/2-1″ should do the trick. Conversely, maybe people thing it’s easier to get the worms to migrate down instead of us, so they will put the container they are feeding below the one that is ready to harvest. I think for this particular setup, the finished container will be too heavy to lift as you add food scraps to the container below.
‘
How does human manure work with this system.?
Any for and against thoughts.??
It is recommended that any manure used be pre-composted for at least 60 days to remove the moisture and kill off any pathogens. Humans take so much medication and supplements that it probably wouldn’t be a good idea.
Thanks for this information article. Last question… How do you harvest the castings without accidentally harvesting the worms?
I don’t think there really is an easy way to harvest castings without harvesting some worms at the same time. So long as you add your castings to soft soil, the residual worms should be able to burrow down relatively easily. j=
When I harvest my bin, I tend to just dump the contents onto a large plastic sheet I have. Worms dislike heat and sunlight, so they will start to burrow down. As they go down, you can start to scrape the top of the pile (which was at the bottom of the bin). This should contain mostly finished castings. You probably won’t be able to harvest all the castings. Once you get tired of scraping the pile, add the contents back into the bottom of the bin, then add fresh bedding.
Do you need to add bedding occasionally and when do you know when to do so?
I try to keep my system 12 to 18″ deep. As it settles in you can add new bedding on the top, but don’t forget to also occasionally harvest the castings which will require you to then add more fresh bedding.
So I did everything per the instructions here. Not only was screening not optional, even with screening, the worms still wriggled out of the bin. Not to mention that my worms were European Night Crawlers, which are much bigger than red wrigglers. How do you actually get the worms to stay in the bin? I have good organic soil in there, and fresh, ground up organic veggie scraps. Pretty frustrated right now at how many worms I have lost.
The 1/4 inch holes on the side of the bin are they on the entire side of the bin, or just one roe?
I tend to put holes on all sides of the bin so that air can better circulate. So long as you keep your wormies happy they won’t try to escape through the holes!
Nice article! 2 questions: my veggie/berry garden consists of 18 beds of 2-1/2′ x 32′ which amounts to about 1440sqft. How much vermicompost will I need to produce and secondly, how many setups above will I need? Of course I’m going to learn on just (1)!
Wow, you have quite a large operation! I have (1) 4′ x 12′ plot and just added 10 gallons of vermicompost. It honestly wasn’t enough to really cover the whole area like I wanted to. For an operation of your size, You’d probably need one of your planter boxes worth of worms to support your needs. The box I suggested in this post took months to generate enough castings for my one planter box. I think you’d be better off setting up a few of theses, but also creating your own compost with horse manure that you can age, which worms like to eat, and is easy to manage. I’d love to see a pic or two of your set up! Thanks for your comment.